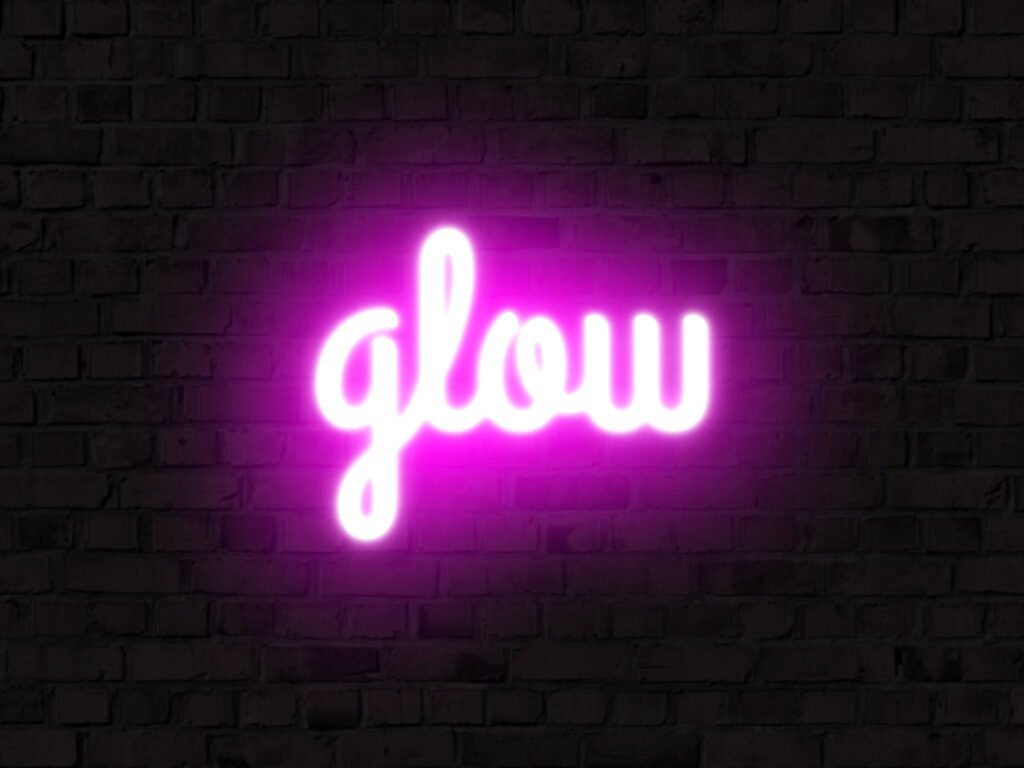
Let me show you how to create a neon glow effect using Affinity Designer so that you can use it in your designs.
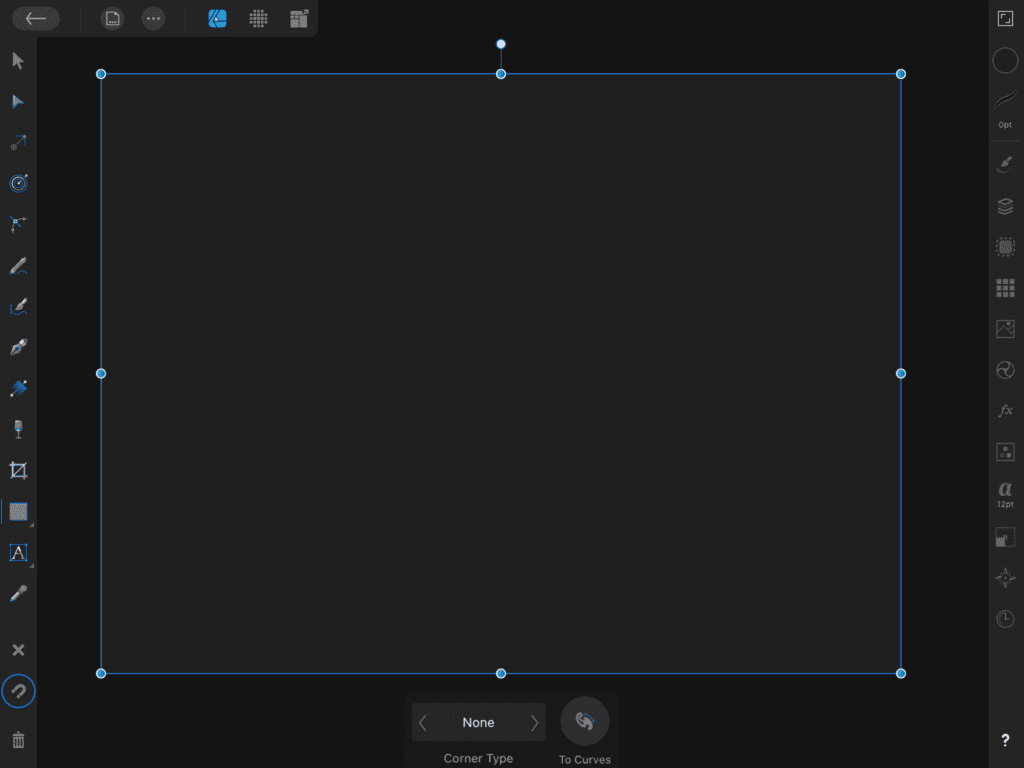
Open affinity designer and create a new document. The dimensions of the canvas and colour profile are completely up to you for whatever project you are working on. Once you have your new document use the rectangle tool and create a rectangle that covers the entire canvas. Using the colour selection tool make this rectangle black or a very dark grey. This dark colour allows the glow to pop off the background and completes the effect of the neon lights on a dark night.
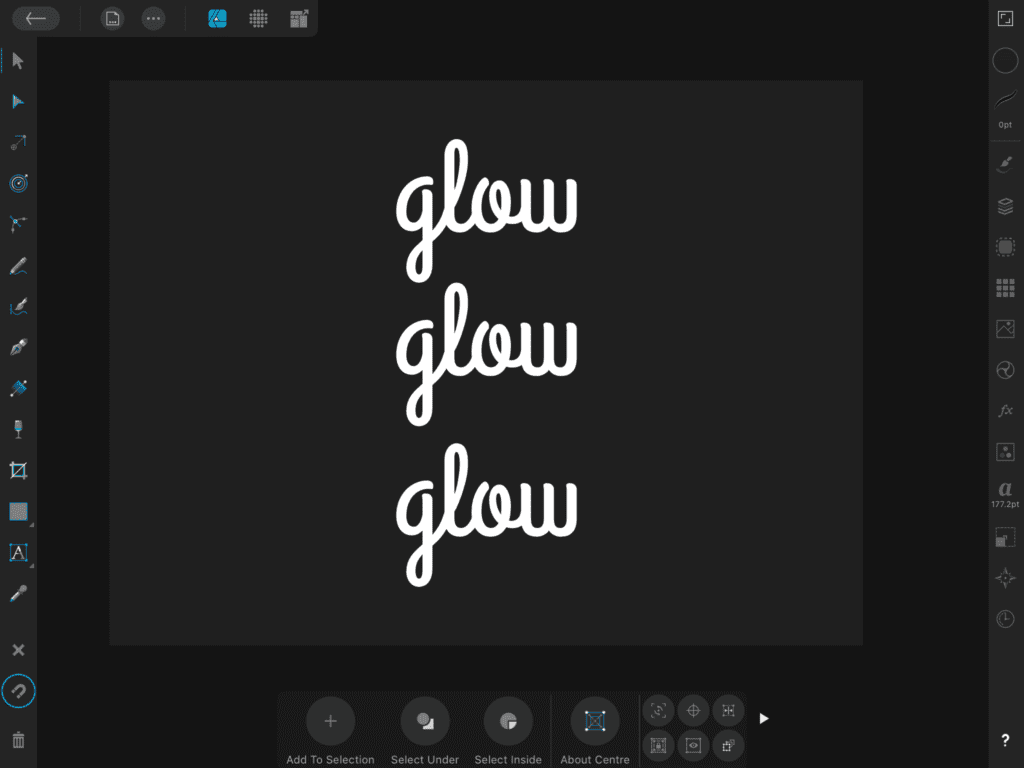
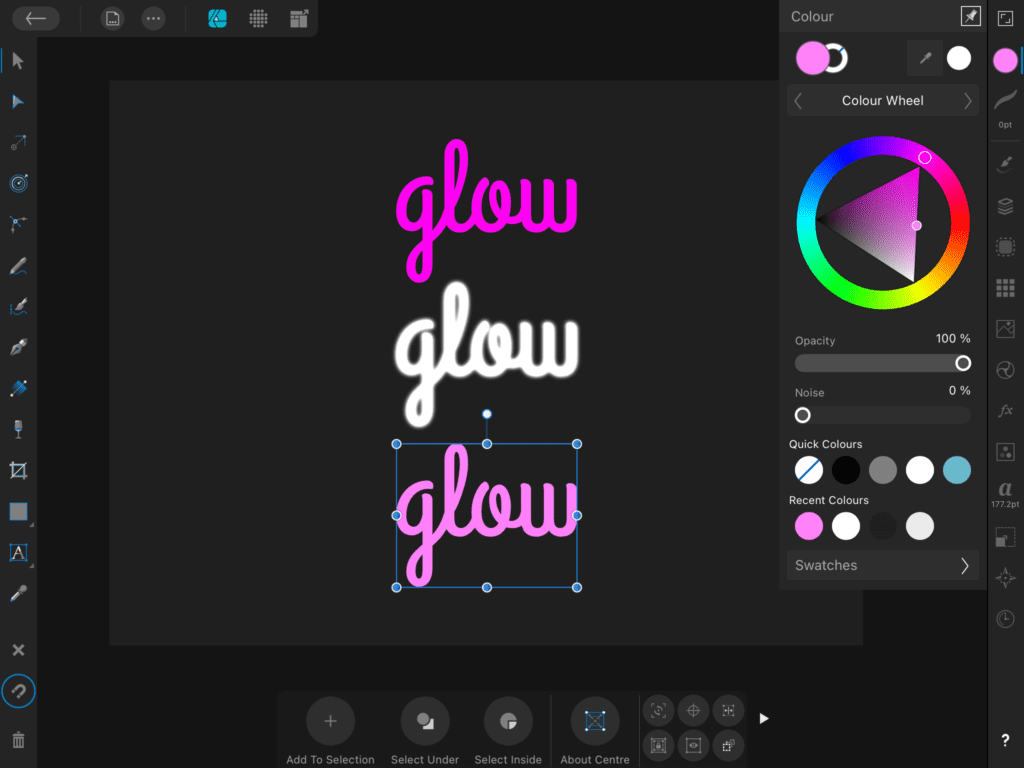
Now using the artistic text tool create whatever text you want to use in your project. For this example, I have used the word ‘glow’. Change the colour to white so you can see what you are working with. Change the font if you like. I am using ‘grand hotel’ which I imported to Affinity designer. This font lends itself to giving the appearance of a fluorescent light with its curved shapes and flowing cursive however I find any thin cursive font looks good. Remember to get creative, have fun, and see what you can come up with.
Now duplicate your writing and make two copies so you have three elements on the canvas. You can do this by selecting the text and using duplicate on the menu or holding two fingers on the canvas and dragging a copy if you are using affinity designer on the iPad.
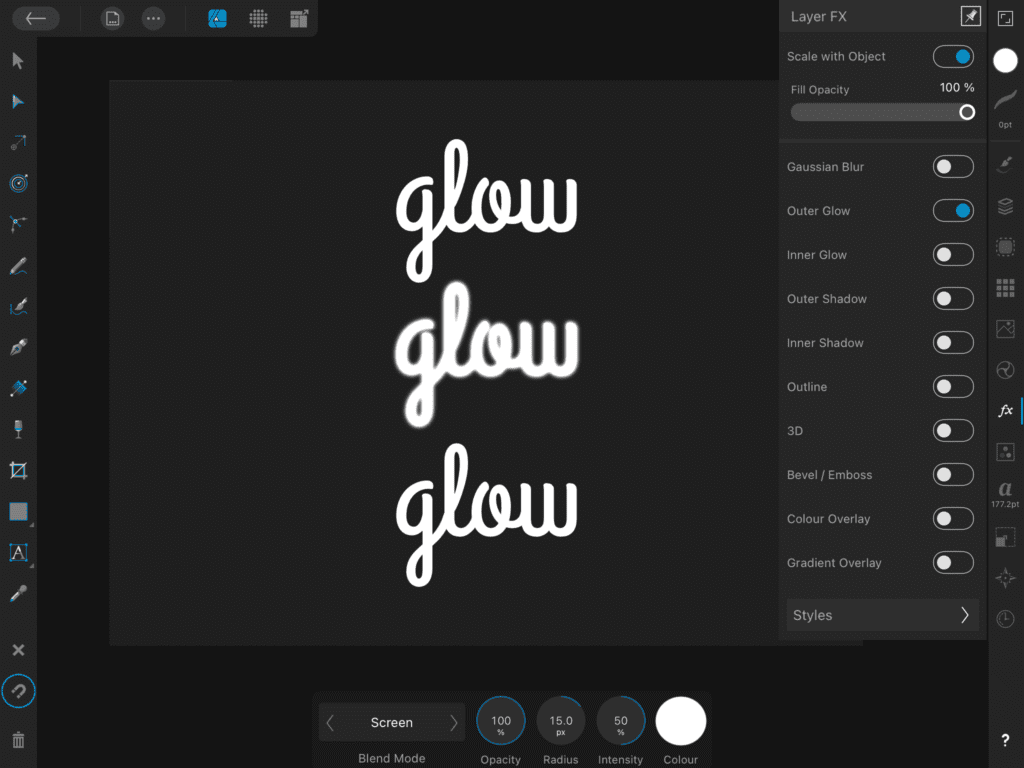
Now the glow method involves using the ‘fx’ tools and layering effectively. The top layer is the ‘tube’. This text will remain white. With this text selected open the ‘fx’ menu. Select ‘Outer Glow’ and turn it on. Then using the context tool menu you only need to increase the radius by a few pixels to give the impression that it is glowing very intensely bright white. In this example, i used 15px. Click scale on resize so the effect doesn’t change when we resize our image and that text is complete.
Choose a colour for your glow. Once it’s selected change the bottom text to that colour. Now the second layer down is a mix of half your bright colour and white.
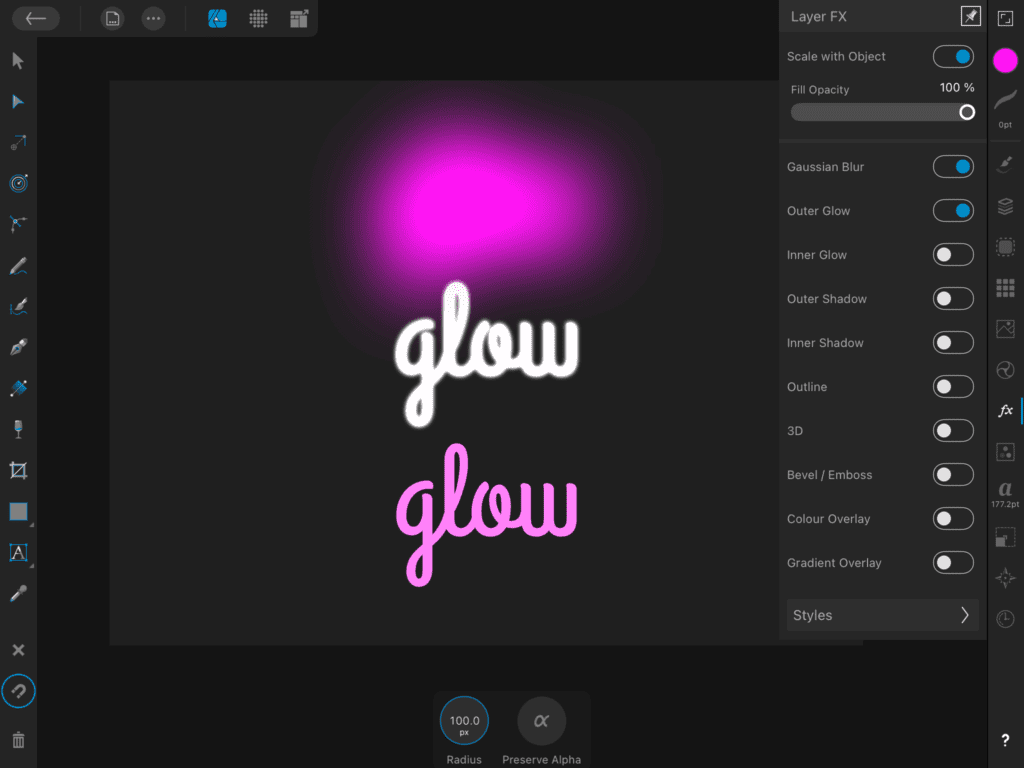
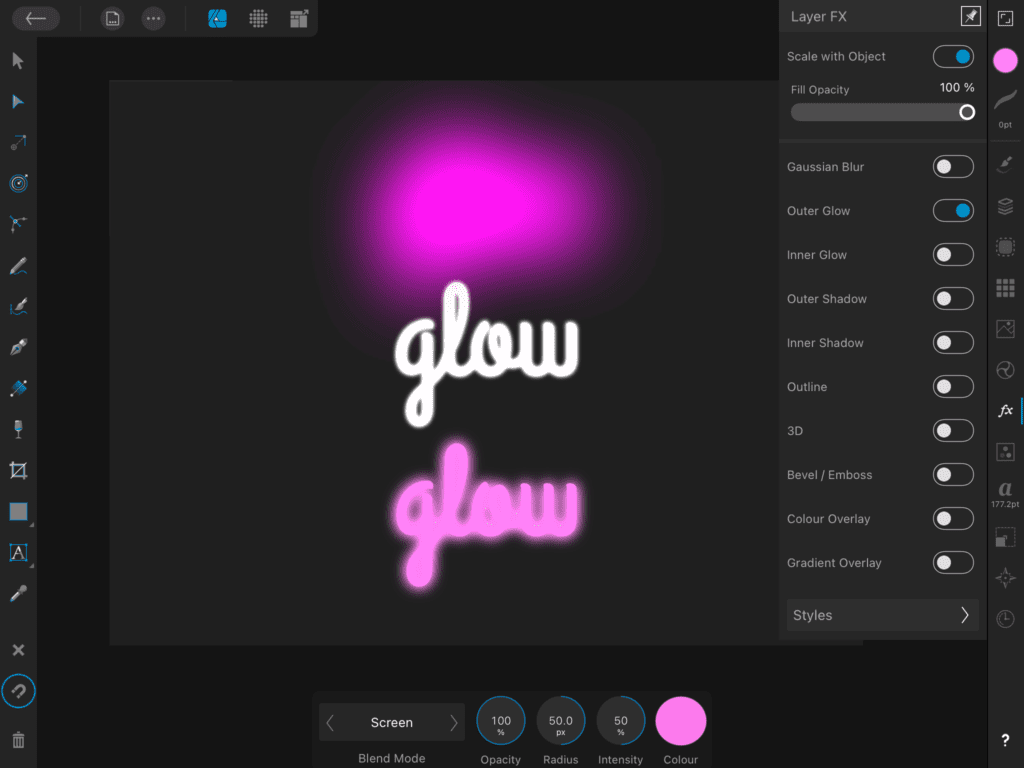
Now with the bottom text selected go into the ‘fx’ menu. Select ‘outer glow’. Using the context toolbar increase the radius to about 80px and the intensity to about 75%. Then select ‘Gaussian blur’. Increase the blur by about ‘100’ pixels. Ensure you select scale with object.
Now with the middle text selected again open the ‘fx’ tools and select ‘Outer glow’. Set the radius to about ‘50px’. Again select scale with object.
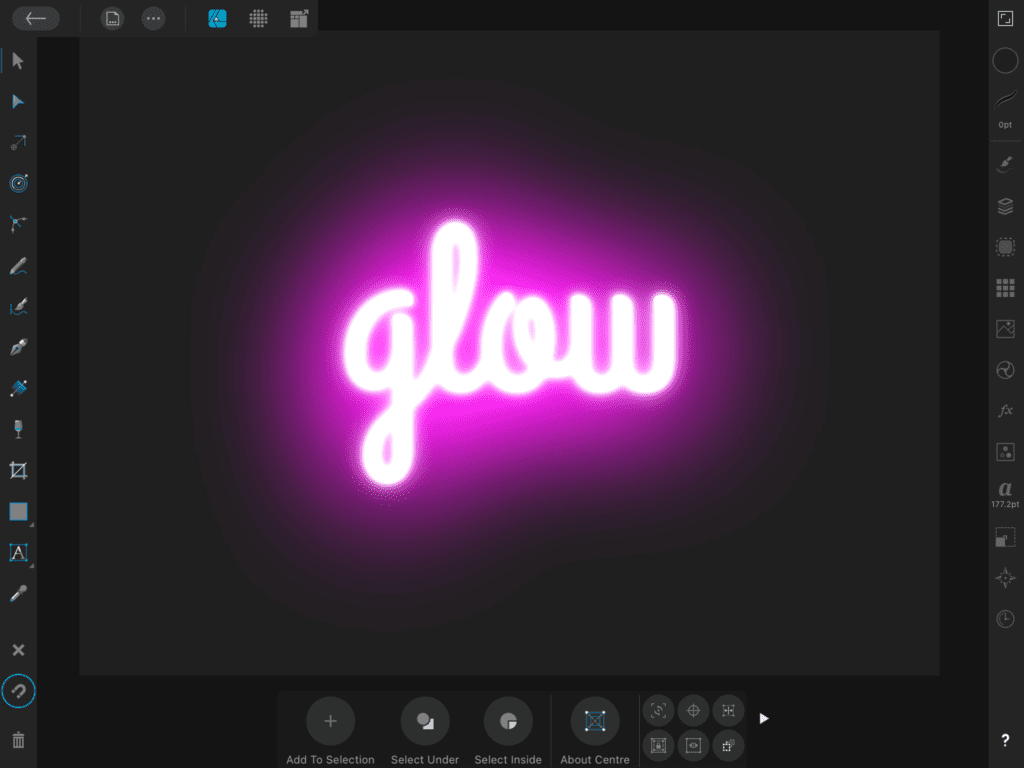
Now we are ready to layer the text. Using snapping or the transformation tool layer the text on top of one another. Ensure the white text is on top, followed by the middle text and finally the bright colour we selected on the bottom. You should have a glowing neon sign.
If you want to really set off your design and give it an element of realism you can apply a texture layer to the black rectangle and mask it.
There you go! Easily create a neon glow effect using affinity designer. If you are looking for powerful graphic design software and want an alternative to adobe products I highly recommend checking out Affinity and their range of products.